Disclaimer: This post may contain affiliate links, meaning, at no additional cost to you, we earn a commission if you use these links & make a purchase. We only recommend items that we use & trust.
BE SURE YOUR SITE IS LEGAL. Click HERE to learn more.
SETTING UP WORDPRESS
This is where it all happens! The back end of your wordpress site-“Command Central”.
If you're a technically inclined person, this will be easy for you…even if you're not, this isn't too difficult if you follow the images and instructions. Even easier, there are a number of YouTube videos that are very helpful. If you're still struggling with this, I suggest you hire someone to set it all up for you so you'll be freed up to write posts, find images, promote etc…
Let's get started. Once you get your password from BlueHost (if you need instructions for getting started with Bluehost, click here), you can sign in and begin creating your WordPress site.
You'll be on this screen. This is your dashboard. MAKE SURE you display a “Coming Soon” page to keep your site private while building it!!!
You can change the colors of your dashboard if you want by clicking “Screen Options” in the upper right. I made mine blue.
Next, you're going to choose your Theme by first clicking on Appearance, then Themes which will bring you to the following screen.
There are many themes to choose from. Some are free and there are premium themes. If it's in your budget, I recommend purchasing a premium theme. I use the Divi Theme. After you purchase your premium theme, download the.zip file and click the “Add New” button.
Now for the finishing touches:
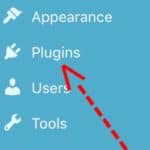
1. Add your Plugins:
These are bits of software that can be uploaded to extend and expand the functionality of your WordPress site.
Some of the ones to be included are: (You can research other options)
- Coming Soon Page and Maintenance Mode by SeedPod
- All In One SEO
- Akismet (comment spam)
- Contact Form 7
- Jetpack by WordPress
- Wordfence Security
- Yoast SEO
- Simple Share Social
- Pretty Links Pro
- Cookie Law Info
- Google Analytics Dashboard for WP
- Hello Dolly
- These are just a few to get you started. There are any more for you to choose!
2. Add Your Widgets:
You just choose from the left column and place them where you want in the right column.
3. Your Menu
This is where you arrange your pages in the menu. Just move them from the left column in the order you'd like them in the right column. You can also create sub items by indenting them.
That's it! You did it!
***To earn more money from your blog with Affiliate Marketing , check out my post by clicking here.
Earn more money from your blog with Affiliate Marketing , check out my post by clicking here.
19 Streams of Income You Can Add To Your Blog/Website…Click Here
4 Smart Investments To Make For Your Business…Click Here


